

Flat Pack Sliding Wardrobe Doors- Installation Guide
Flat Pack Sliding Wardrobe Doors are designed to make DIY installation simple while still delivering a professional built-in appearance. Whether you are replacing existing wardrobe doors or fitting doors into a newly constructed opening, our custom-made sliding wardrobe doors are manufactured to suit your exact measurements and supplied with matching track systems. With the correct preparation and installation process, Flat Pack Sliding Wardrobe Doors can provide a stylish, practical and space-saving storage solution for any bedroom. This installation guide has been created to help you understand the installation process and achieve the best possible result from your new sliding wardrobe doors.
Step 1- Unwrap the track kit
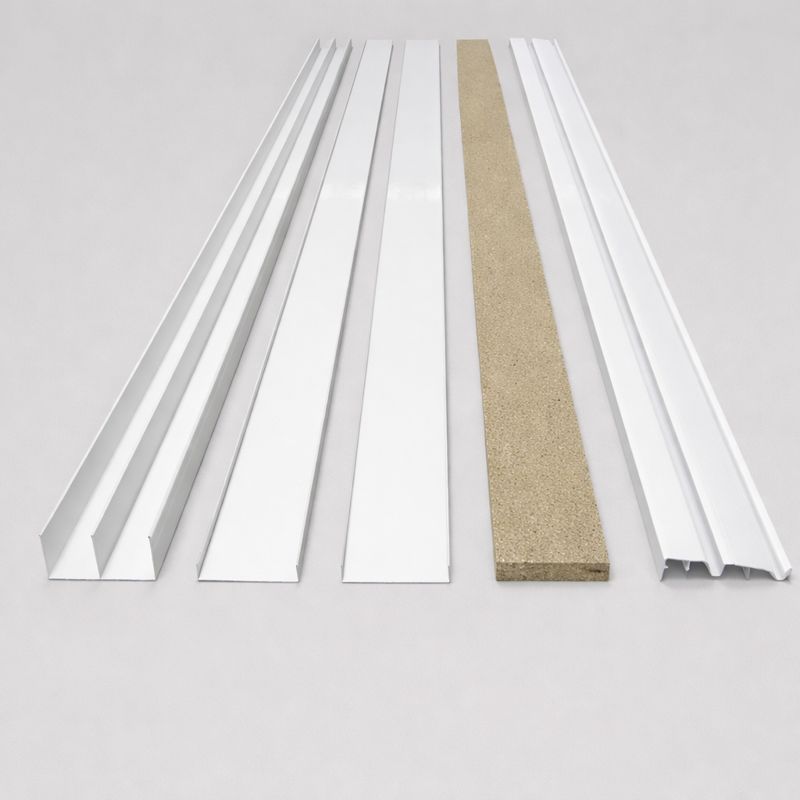
Your track system will come wrapped together. Remove the wrapping that holds the pieces together and ensure that you have all the components like the below image (Image shows tracks for a wall to wall setup).
From left to right, the image shows the Top Track, Wall Jamb, Wall Jamb, Timber batten (installed under the bottom track) & the Bottom track.
Step 2- Measure and cut down the wall jambs
Measure the opening height on the left and right side and cut down the wall jambs accordingly.
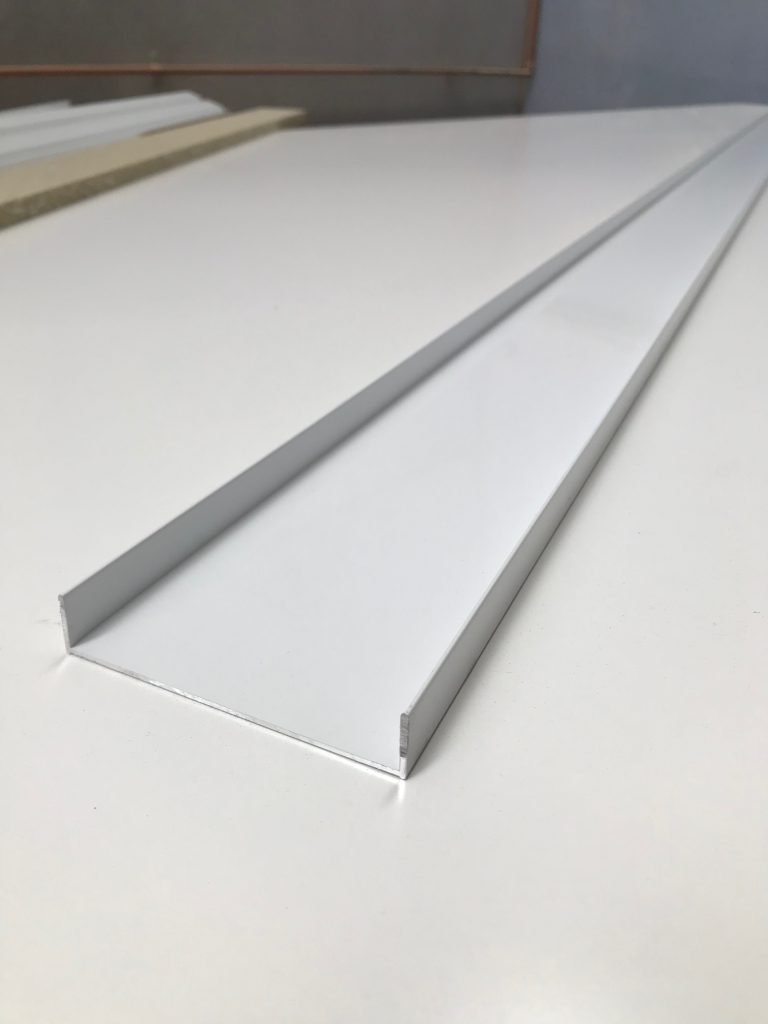
Step 2- Install the wall jambs
Fix the wall jambs on the left and right of the opening. The flat side of the wall jamb should be fixed directly onto the wall using either screws OR glue/adhesive for a cleaner look. If using screws, centre the screws in the middle of the wall jamb. One screw can be positioned around 150mm from the floor, one can be positioned 150mm from the top of the opening and one can be positioned in the middle of the top and bottom screw. If using adhesive, apply the glue in a zigzag line from the top to the bottom of the wall jamb (ensuring that the glue isn’t too close to the edges as this will result in glue escaping from behind the wall jamb when pressure is applied to the jamb to stick it to the wall.
Step 3- Measure, cut down & fit the timber batten
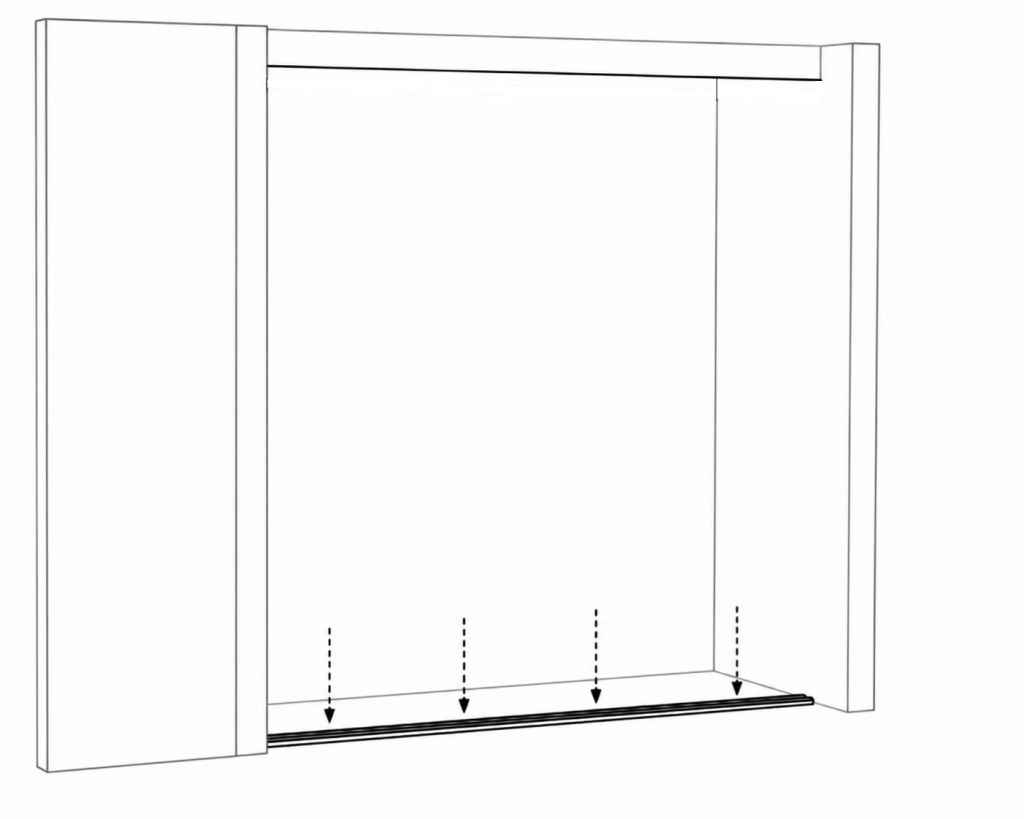
Measure the distance between the left and right wall jambs at floor level and cut the 16mm timber batten to suit. The batten is positioned directly beneath the bottom track and provides a level mounting surface. Once cut to length, position the batten neatly between the wall jambs before screwing/gluing it down.
Step 4- Measure, cut down & fit the bottom track
Measure the distance between the left and right wall jambs at floor level and cut the bottom track to the required length using a suitable saw. Position the track on top of the previously installed timber batten, ensuring the front lip of the track covers the front edge of the batten for a neat finished appearance. Once correctly aligned between the wall jambs, fix the bottom track securely into position using screws.
Step 5- Measure, cut down & fit the top track

Measure the distance between the left and right wall jambs at ceiling level and cut the top track to the required length using a suitable saw. Position the top track between the wall jambs, ensuring it is directly aligned with the bottom track below. Once correctly positioned, secure the top track firmly to the ceiling or supporting structure using appropriate fixings.
Step 6- Install the doors on the tracks
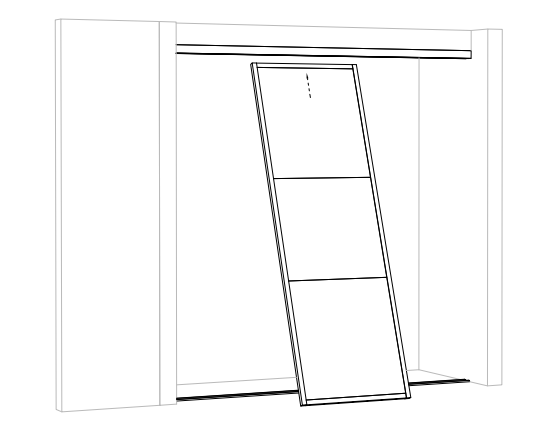
With the tracks securely installed, the sliding wardrobe doors can now be fitted. Carefully lift the first door and insert the top of the door into the rear channel of the top track before lowering the bottom rollers into the corresponding rear channel of the bottom track. Repeat the process for the remaining doors, ensuring each door is installed in the correct track position. Once fitted, slide the doors back and forth to confirm smooth operation and make any necessary roller adjustments to achieve an even appearance and proper alignment.